UP TO 18% AUTUMN DISCOUNT! TAKE ADVANTAGE NOW! International delivery to EU member countries!

 EN/
 Romana
Concrete Fence Block Mix Recipe
REQUIRED MATERIALS
1. Mold support:
- 21 mm thick phenolic plywood (film-faced plywood);
- wood screws;
2. Assembly:
- M8 hex head bolts with washers and nuts, 20 mm length
3. Mix composition:
- 8 liters of water;
- 1 bucket (10 liters) of white cement (we recommend Holcim Blanco Plus);
- 1 bucket (10 liters) of marble powder;
- 2 buckets (10 liters) of 4-8 mm marble aggregate;
4. Reinforcement (optional):
- a handful of polypropylene fibers for mortar and concrete (we recommend Sika);
5. Cleaning:
- water;
- white vinegar.
6. Lubrication:
- Decofrol release agent
7. Installation
- 8 mm ribbed steel bars
- Primus white stone adhesive
- Isomat AK 20 adhesive
8. Grinding
- flap sanding disc for angle grinder
9. Painting
- exterior masonry paint;
INSTRUCTIONS FOR USE
1. Mold preparation:
- wash the molds with water and make sure they are clean;
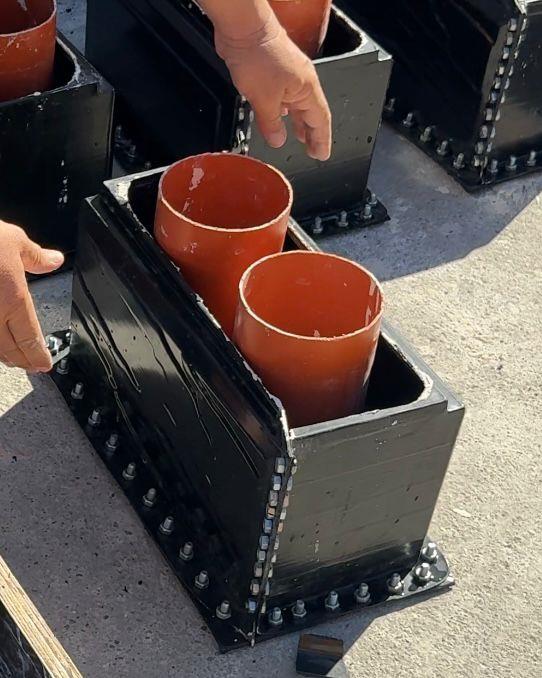
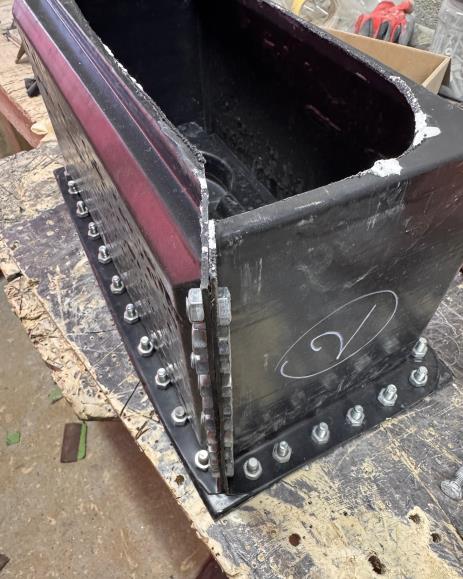
- attach the base to the two side sections using the bolts and nuts;
- to connect the two side sections together, the bolts must be cut so that only 10 mm remains. If they are not shortened, the mold will not fit into the support.
BUILDING THE MOLD SUPPORT
- for the 40x20 cm fence block, you will need phenolic plywood cut to the following dimensions: 2 pieces (44.5 x 19.5 cm), 2 pieces (17.5 x 19.5 cm), 2 pieces (24 x 19.5 cm), and 1 piece (55 x 33 cm);
- for the 20x20 cm fence block, you will need phenolic plywood cut to the following dimensions: 4 pieces (26 x 19.5 cm), 4 pieces (20.5 x 19.5 cm), and 1 piece (26 x 26 cm);
- for the 30x30 cm fence block, you will need phenolic plywood cut to the following dimensions: 2 pieces (34 x 20.5 cm) and 2 pieces (30.5 x 20.5 cm);
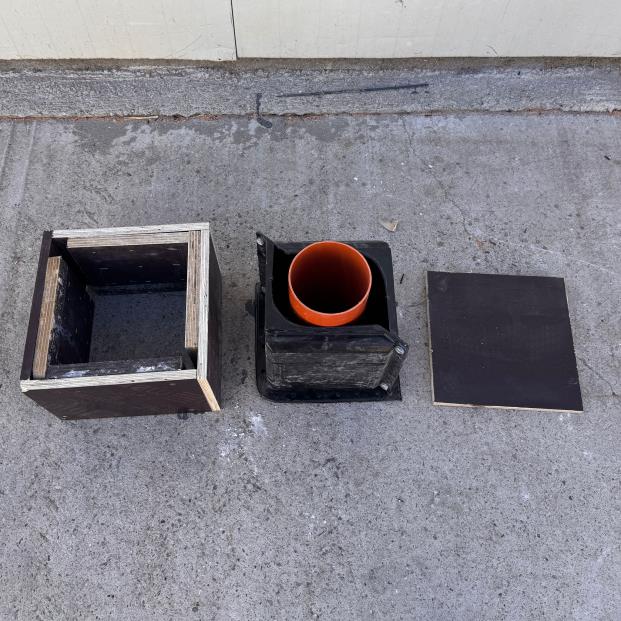
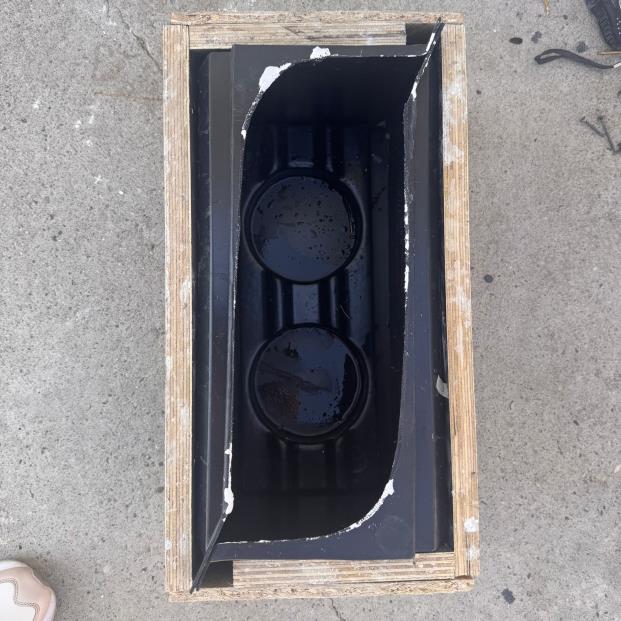
- assemble the support by fastening the plywood pieces together with wood screws, as shown in the image;
- place the mold onto the plywood and secure it with 2-3 wood screws, then place the support frame over it;
2. Preparing the mix:
- first mix the polypropylene fibers with the cement, then add them together with the water, marble powder, and marble aggregate into the concrete mixer and mix thoroughly.
- place the mold, previously coated with Decofrol release agent, into the support and pour the prepared mixture into the mold;
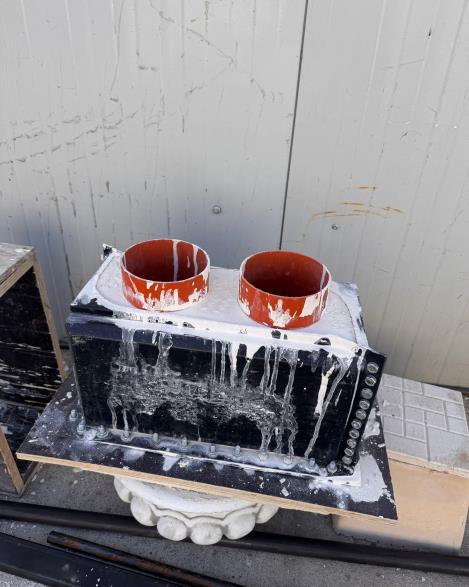
- allow it to dry completely for 24/48/72 hours, depending on the outside temperature: 24 hours in summer, 48 hours in spring/autumn, and 72 hours in winter (indoors if the room is unheated).
- once completely dry, remove the wood screws from the plywood, undo the bolts, and remove the side mold sections. Then turn the fence block upside down with the tubes facing downward and press on them until the tube mold rises upward;
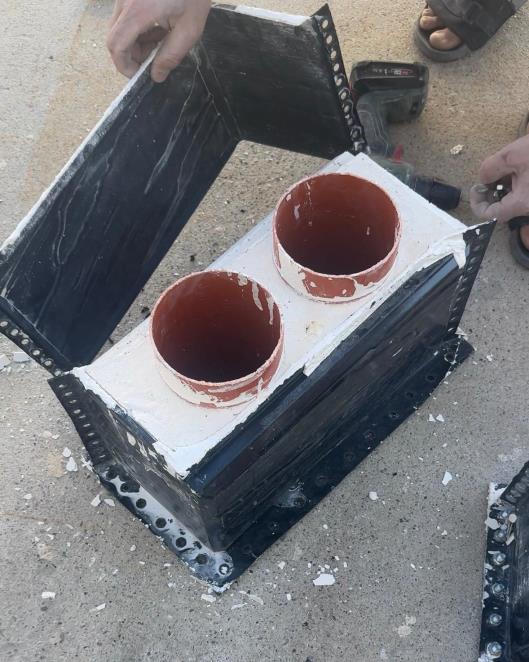
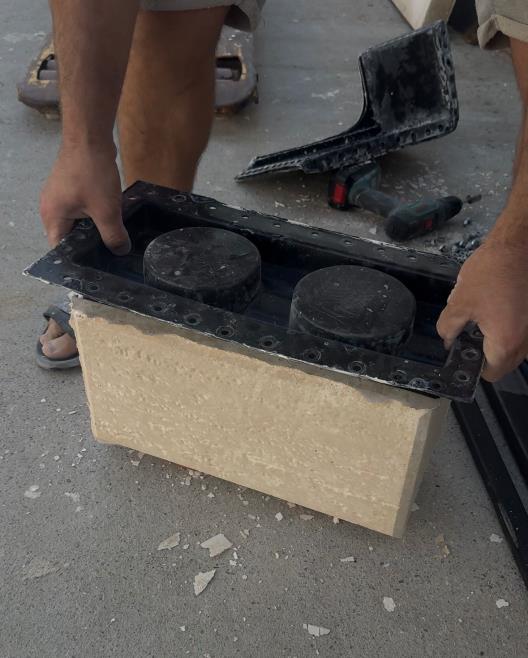
- turn the fence block over and press on it so the tubes protrude upward, then pull them out using locking pliers;
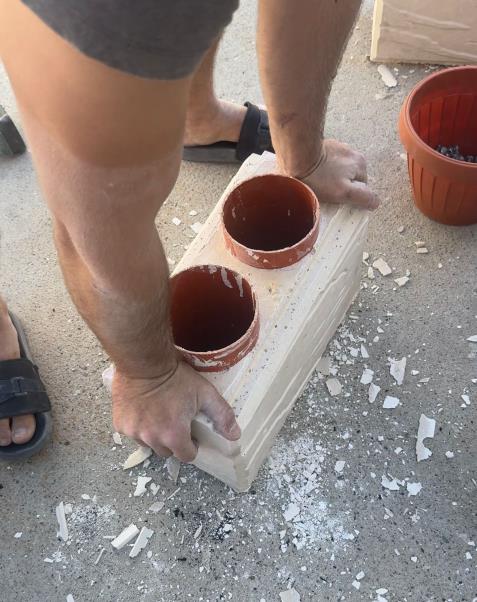
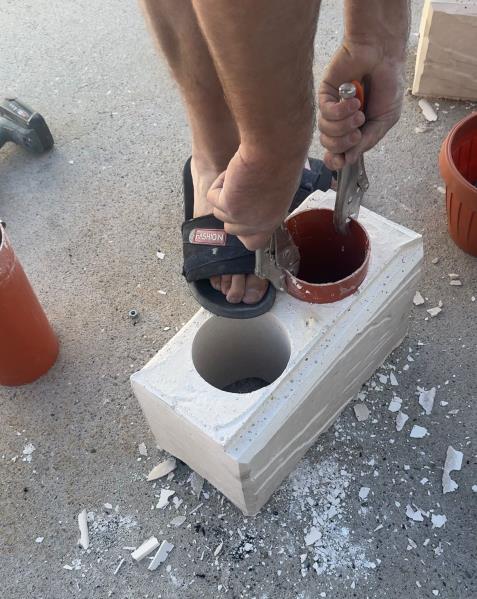
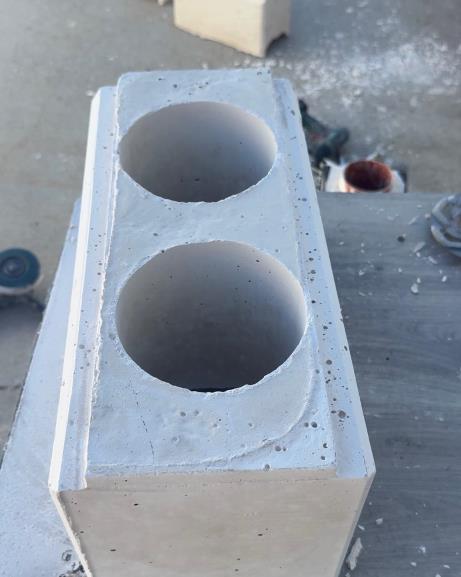
- remove any flash by grinding the edges with an angle grinder fitted with a flap sanding disc, then smooth the two upper corners.
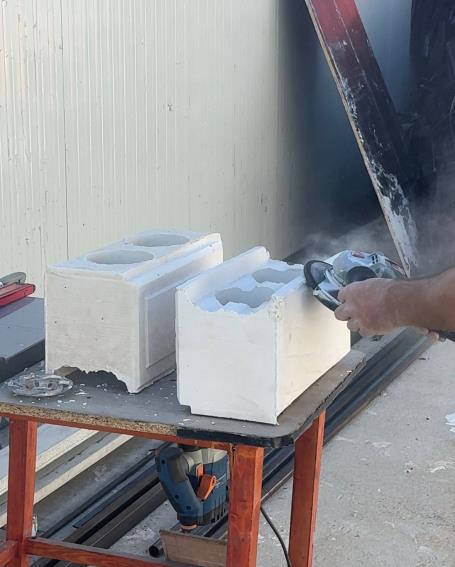
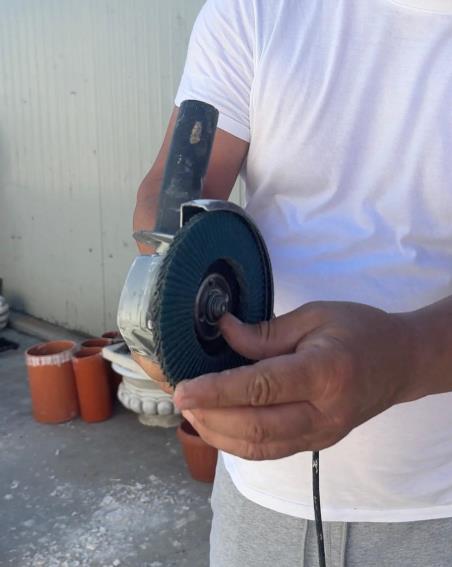
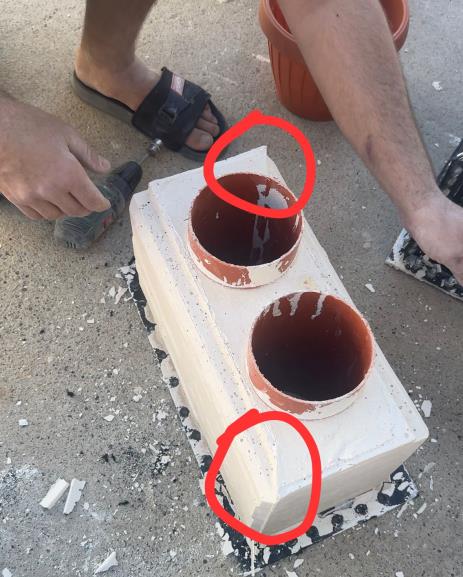
CLEANING
Fill the molds with water and white vinegar, then use a soft sponge to remove all residue.
INSTALLATION
The fence blocks are installed using Primus white stone adhesive and the joints are filled with Isomat AK 20 adhesive. For additional strength, place ribbed steel bars along the edge of each fence block, as shown in the image.
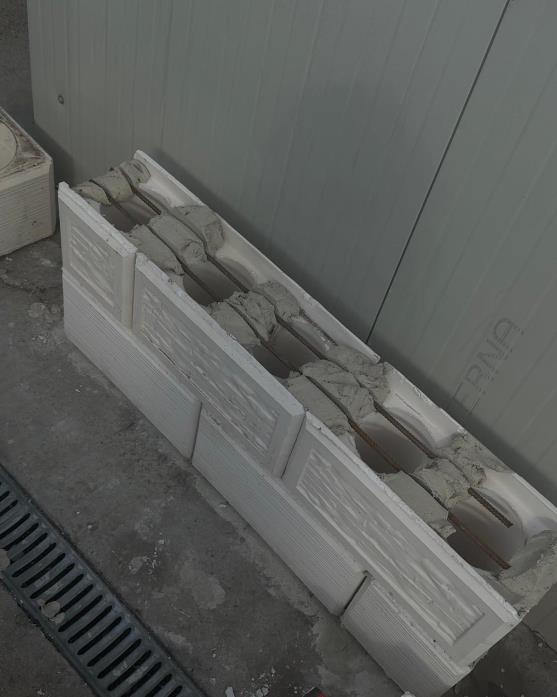
Pour concrete through the holes in the fence blocks.
PAINTING
After the wall has been built and the joints have been filled, paint the fence blocks with exterior masonry paint.
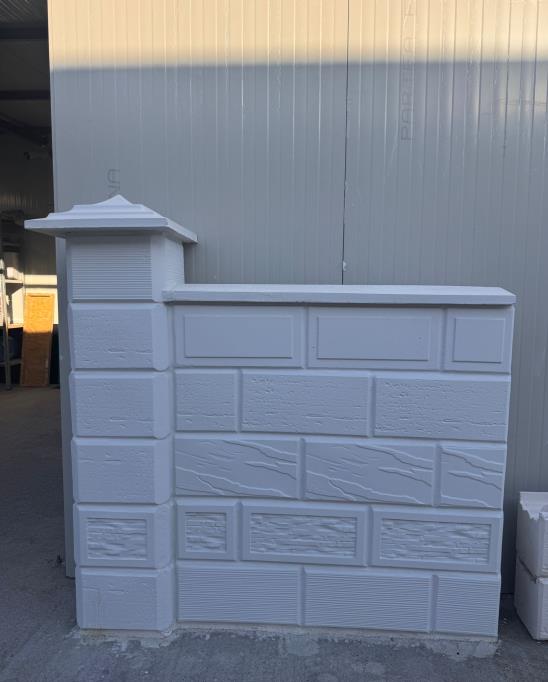
WARNING! The mix composition is intended for one full concrete mixer batch, not for a single fence block.
1. Mold support:
- 21 mm thick phenolic plywood (film-faced plywood);
- wood screws;
2. Assembly:
- M8 hex head bolts with washers and nuts, 20 mm length
3. Mix composition:
- 8 liters of water;
- 1 bucket (10 liters) of white cement (we recommend Holcim Blanco Plus);
- 1 bucket (10 liters) of marble powder;
- 2 buckets (10 liters) of 4-8 mm marble aggregate;
4. Reinforcement (optional):
- a handful of polypropylene fibers for mortar and concrete (we recommend Sika);
5. Cleaning:
- water;
- white vinegar.
6. Lubrication:
- Decofrol release agent
7. Installation
- 8 mm ribbed steel bars
- Primus white stone adhesive
- Isomat AK 20 adhesive
8. Grinding
- flap sanding disc for angle grinder
9. Painting
- exterior masonry paint;
INSTRUCTIONS FOR USE
1. Mold preparation:
- wash the molds with water and make sure they are clean;
- attach the base to the two side sections using the bolts and nuts;
- to connect the two side sections together, the bolts must be cut so that only 10 mm remains. If they are not shortened, the mold will not fit into the support.
BUILDING THE MOLD SUPPORT
- for the 40x20 cm fence block, you will need phenolic plywood cut to the following dimensions: 2 pieces (44.5 x 19.5 cm), 2 pieces (17.5 x 19.5 cm), 2 pieces (24 x 19.5 cm), and 1 piece (55 x 33 cm);
- for the 20x20 cm fence block, you will need phenolic plywood cut to the following dimensions: 4 pieces (26 x 19.5 cm), 4 pieces (20.5 x 19.5 cm), and 1 piece (26 x 26 cm);
- for the 30x30 cm fence block, you will need phenolic plywood cut to the following dimensions: 2 pieces (34 x 20.5 cm) and 2 pieces (30.5 x 20.5 cm);
- assemble the support by fastening the plywood pieces together with wood screws, as shown in the image;
- place the mold onto the plywood and secure it with 2-3 wood screws, then place the support frame over it;
2. Preparing the mix:
- first mix the polypropylene fibers with the cement, then add them together with the water, marble powder, and marble aggregate into the concrete mixer and mix thoroughly.
- place the mold, previously coated with Decofrol release agent, into the support and pour the prepared mixture into the mold;
- allow it to dry completely for 24/48/72 hours, depending on the outside temperature: 24 hours in summer, 48 hours in spring/autumn, and 72 hours in winter (indoors if the room is unheated).
- once completely dry, remove the wood screws from the plywood, undo the bolts, and remove the side mold sections. Then turn the fence block upside down with the tubes facing downward and press on them until the tube mold rises upward;
- turn the fence block over and press on it so the tubes protrude upward, then pull them out using locking pliers;
- remove any flash by grinding the edges with an angle grinder fitted with a flap sanding disc, then smooth the two upper corners.
CLEANING
Fill the molds with water and white vinegar, then use a soft sponge to remove all residue.
INSTALLATION
The fence blocks are installed using Primus white stone adhesive and the joints are filled with Isomat AK 20 adhesive. For additional strength, place ribbed steel bars along the edge of each fence block, as shown in the image.
Pour concrete through the holes in the fence blocks.
PAINTING
After the wall has been built and the joints have been filled, paint the fence blocks with exterior masonry paint.
WARNING! The mix composition is intended for one full concrete mixer batch, not for a single fence block.